
Preparing the Hardness Tester for Calibration
Instrument Setup, Support Stability, and Alignment Verification
Mount the hardness tester on a solid, vibration-free surface to keep measurements accurate. The test stage needs to be level and firmly secured because any wobbling will mess up the indentation results. Check if the indenter is straight up and down with a good quality level tool. Even small angles off center (more than half a degree) can throw off Rockwell numbers by as much as 1.5 points. When working with Rockwell equipment specifically, make sure the anvil sits at right angles to where the force applies, ideally no more than 0.1 millimeter off. Getting this wrong actually breaks the ASTM E18 guidelines. Setup mistakes are responsible for around one third of all problems seen in real world testing situations, which makes proper preparation absolutely critical for reliable results.
Indenter Inspection, Anvil Integrity Check, and Perpendicularity Validation
Check out the indenter tip through a 10 times magnifier. Diamond cones used for HRC testing need to look good - no chips, cracks, or rounded edges allowed. If something looks off about the indenter, swap it right away. Even tiny scratches can change how deep it goes into materials and mess up all the readings. When looking at the anvil, make sure it's flat by running a straightedge across its surface. Any bumps or warps bigger than two hundredths of a millimeter will throw off how specimens sit during testing. To check if the anvil stands straight, run a test block against it with a dial indicator. Deviations over half a millimeter mean we're not meeting those ISO standards anymore. All these little details matter because when companies fail their qualification tests, it costs around twelve grand each time for aerospace firms to fix things.
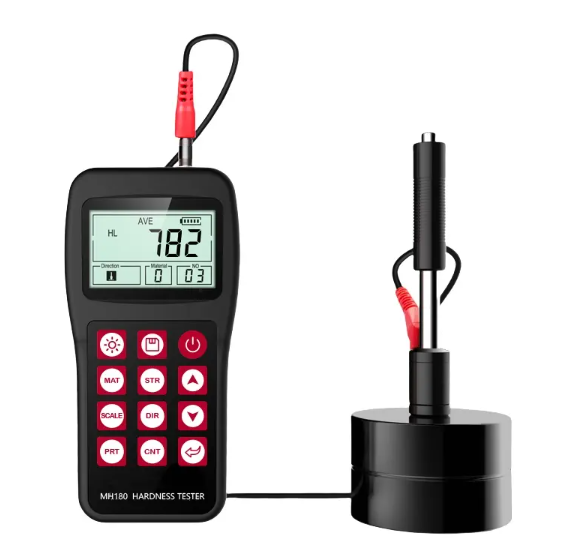
Executing the Hardness Tester Calibration Procedure
Step-by-Step Operation: Zeroing, Load Application, and Indentation Measurement
Start by making sure the instrument is properly zeroed out so we have a good starting point for our measurements. Next step is applying what's called the preliminary test force, usually around 10 kgf when working with Rockwell B or C scales. This helps get the indenter sitting flat against whatever material we're testing. Now comes the main load application which varies between 60 to 150 kgf based on the specific scale being used. We need to hold this pressure steady for approximately 10 to 15 seconds according to ASTM E18 guidelines. Once all the weight has been removed completely, take measurements either of how deep the indentation went in Rockwell tests or its diameter size for Brinell and Vickers methods using proper calibration equipment. For each certified test block, do at least three separate readings to check if results stay consistent. If there's more than a 0.3 HR difference between them, that probably means something isn't quite right with either the person doing the test or maybe even the machine itself needs looking at again.
Calibration Standard Selection and Tolerance Compliance (±0.5 HR, ±0.05 mm)
When choosing reference blocks for hardness testing, it's important to pick ones that are NIST traceable and match both the hardness range and material being tested regularly. For instance, steel blocks work best for HRC tests while brass is typically used for HRB readings. Always check if the certification is still current since most accredited blocks lose their validity somewhere between one and two years from purchase. The actual hardness numbers should stay within plus or minus 0.5 HR points of what's listed on the certificate. Indentation depths measured against a stage micrometer shouldn't vary by more than 0.05 mm either. Sticking strictly to these standards helps avoid gradual measurement drift over time. And let's face it, nobody wants to spend upwards of $58k each year just because equipment needs frequent recalibrations. That kind of expense was highlighted recently in an article from Quality Digest back in 2023.
| Parameter | Tolerance | Verification Method |
|---|---|---|
| Rockwell Hardness | ±0.5 HR | Certified Test Blocks |
| Indentation Depth | ±0.05 mm | Stage Micrometer |
Maintain calibration logs that include reference block serial numbers, environmental conditions (temperature, humidity), observed deviations, and technician verification—ensuring full traceability for internal audits and ISO/IEC 17025 compliance.
Ensuring Long-Term Accuracy of the Hardness Tester
Root Causes of Field Drift Beyond Indenter Wear
Indenter wear gets mentioned a lot, but really, long term drift comes from several things working together over time. When hydraulic systems start to break down, they can throw off load measurements by more than plus or minus 1.5 percent according to ASTM standards. Temperature changes matter too. If conditions go above or below the standard 23 degrees Celsius by just five degrees, that causes problems with how materials expand and contract. We're talking about errors around 0.07 HR per degree change, which messes with both the shape of the testing frame and how forces line up properly. Then there's vibration during shipping or regular use that knocks loading parts out of alignment. And don't forget dust getting inside those optical encoders either. Studies show almost 25% of industrial setups suffer from measurement issues around 0.04 mm because of this dust problem. All these combined issues will eventually make equipment perform outside the acceptable range defined by ISO 6508 standards unless someone actually watches for them and takes corrective action.
Environmental Controls, Frequency Guidelines, and Traceability Protocols
Keeping the environment around 23 degrees Celsius plus or minus 2 degrees, along with relative humidity between 45% and 55%, is really important according to ASTM E18-22 standards. Most problems happen when these parameters drift outside this window. Labs should remember to calibrate instruments they use every day about once per quarter. Equipment that gets used less frequently still needs checking twice a year though. When it comes to reference blocks, they absolutely need to trace back to NIST standards with an uncertainty level no higher than 0.3 HR. Automotive testing facilities working on parts such as gear shafts will find themselves bound by ISO/IEC 17025 requirements which cover all sorts of detailed operational specifications for quality assurance purposes.
- Humidity-controlled storage for calibration blocks
- Digital audit trails capturing every maintenance, calibration, and environmental reading
- Automated drift monitoring with configurable alert thresholds
Documenting temperature and humidity during each calibration enables statistical isolation of thermal variables—proven to reduce field failures by 74% versus reactive maintenance alone.
Meeting Industry Standards for Hardness Tester Calibration
ASTM E18 and ISO 6508 Requirements for Rockwell Hardness Testing
The ASTM E18 and ISO 6508 standards set the global benchmark for Rockwell hardness testing, laying down strict rules about how accurate, repeatable, and traceable these tests need to be. When it comes to calibration, both standards demand pretty tight tolerances: around plus or minus 0.5 HR units for hardness readings and just 0.05 mm variation allowed in indentation depth measurements. Labs have to work with certified reference blocks to meet these specs. Temperature matters too - most facilities keep things stable around 23 degrees Celsius give or take five degrees to avoid any issues from heat changes messing up results. Paperwork is another big deal here, since every calibration needs proper records showing it traces back to official national metrology standards. Checking equipment regularly against standard test blocks isn't just good practice, it's essential for keeping measurement systems working properly. Otherwise mistakes happen that can invalidate material certifications entirely. Real world problems show what happens when companies skip these steps. Some manufacturing plants saw hardness readings off by over 4.3% when they didn't follow protocol, causing major headaches in industries where precision matters most like aerospace components, car parts, and metal processing operations.